

Start here
What Composting Actually Does for Your Soil
Next
What to Add (and What to Keep Out)
Then
Setting Up Your First Compost System
Going deeper
Managing Your Pile: The Four Essentials
Finish strong
How to Recognize and Use Finished Compost
What Composting Actually Does for Your Soil
Composting is the controlled decomposition of organic matter into a stable, nutrient-rich material that improves garden soil in ways synthetic inputs rarely match. When worked into garden beds, finished compost loosens compacted clay soils, helps sandy soils retain moisture, and feeds the vast community of bacteria, fungi, and earthworms that make nutrients available to plant roots.
The practical payoff is real: gardens amended with compost tend to need less supplemental watering, show stronger plant growth, and recover more quickly from drought or disease stress. You're not just feeding plants - you're building a living soil ecosystem that keeps working season after season.
Used as a top dressing, compost also functions similarly to mulch by moderating soil temperature and suppressing weeds. For a deeper look at how these two practices complement each other, see our guide to mulching effectively.
Browns
Carbon-rich organic materials like dry leaves, cardboard, and straw that provide energy for decomposing microbes and keep the pile from getting soggy.
Greens
Nitrogen-rich materials like vegetable scraps and fresh grass clippings that fuel microbial activity and speed decomposition.
Aerobic decomposition
Breakdown of organic matter by microorganisms that require oxygen - the process that creates healthy, odor-free compost when a pile has good airflow.
Vermicomposting
A composting method that uses red wiggler worms to break down food scraps quickly, producing a highly concentrated amendment called worm castings.
Hot composting
An active method of composting where the pile reaches internal temperatures high enough to kill weed seeds and pathogens, requiring regular turning and careful material balance.
Compost amendment
Finished compost mixed into garden soil to improve its structure, nutrient content, and ability to support plant growth.
What to Add (and What to Keep Out)
Every compost pile needs two categories of material working in balance:
- Browns (carbon-rich): Dry leaves, cardboard torn into pieces, newspaper, straw, wood chips, paper bags, and paper egg cartons.
- Greens (nitrogen-rich): Vegetable and fruit scraps, coffee grounds, tea bags (remove staples), fresh grass clippings, and plant trimmings.
Aim for roughly three parts browns to one part greens by volume as a starting point. Too many greens without enough browns leads to a slimy, smelly pile. Too many browns and the pile stalls.
What to leave out: Meat, fish, bones, dairy products, oily or heavily seasoned cooked foods, pet waste, and diseased plant material. These either attract pests, introduce pathogens, or decompose so slowly they disrupt the pile's balance. Black walnut leaves and invasive weed seeds are also worth keeping out unless you're confident your pile runs consistently hot.
Avoid These Common Problem Additions
Meat, dairy, oily foods, and pet waste can introduce harmful pathogens and attract rodents or other pests to your pile. Diseased plant material - such as tomato plants showing signs of blight - can spread disease if the pile doesn't reach consistently high temperatures. When in doubt, leave it out and dispose of it with your regular waste.
Setting Up Your First Compost System
You don't need expensive equipment to start. The three most practical options for first-timers are:
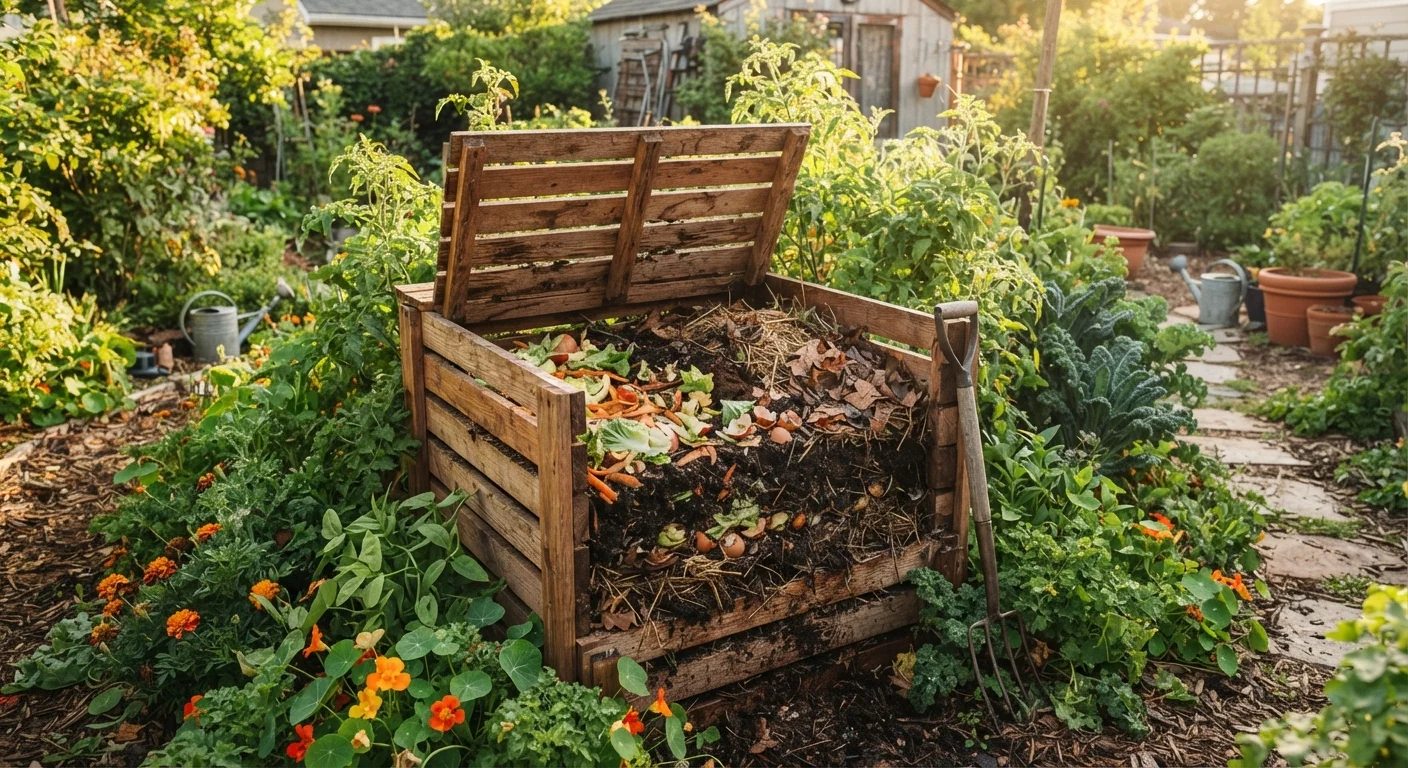
- Open pile or DIY bin: A simple heap in a corner of the yard, or a three-sided enclosure built from pallets or wire mesh. Low cost, high capacity, and easy to turn.
- Tumbler bin: A sealed drum mounted on a frame that rotates for aeration. Better for small yards, tidy appearances, and pest deterrence.
- Worm bin (vermicomposting): Uses red wiggler worms to process kitchen scraps indoors or on a shaded patio. Ideal for apartments or people with very limited outdoor space.
Choose a spot with partial shade, easy access from the kitchen, and reasonably good drainage. A pile sitting in standing water will go anaerobic and smell. If you're using an open pile, place it directly on soil so earthworms can migrate in naturally.
Start by laying a 4-6 inch base of coarse browns like wood chips or straw. This improves airflow from the bottom. Then alternate layers of greens and browns as you add material, moistening each layer until it feels like a wrung-out sponge.
Managing Your Pile: The Four Essentials
Once your pile is established, four factors determine whether it thrives or stalls:
- 1. Moisture
- The pile should stay about as damp as a wrung-out sponge throughout. In dry weather, water it occasionally. In heavy rain, cover it or add dry browns to prevent waterlogging.
- 2. Aeration
- Decomposing organisms need oxygen. Turn the pile with a pitchfork or compost aerator every one to two weeks for a faster, hot pile. Less frequent turning is fine if you're not in a rush.
- 3. Particle size
- Smaller pieces decompose faster. Chop or shred materials when you can - a shredded cardboard box breaks down far quicker than one left intact.
- 4. Balance
- Revisit your browns-to-greens ratio if you notice problems. A pile that smells like ammonia has too many greens. One that looks dry and unchanged needs more greens and water.
Keep a Small Scrap Bucket in the Kitchen
A lidded countertop container makes it easy to collect vegetable peels, coffee grounds, and fruit scraps throughout the day without multiple trips to the pile. Empty it every two to three days to prevent odors. This simple habit dramatically increases how consistently you feed your compost system.
How to Recognize and Use Finished Compost
Finished compost no longer resembles the materials you put in. It should look dark brown to black, smell like fresh forest soil, and have a crumbly, even texture. If you can still identify eggshells, sticks, or fruit peels, give it more time or screen it through hardware cloth to separate the ready material from what needs further breakdown.
Once you have finished compost, three practical uses stand out:
- Soil amendment: Work 1-3 inches into the top 6-8 inches of garden bed soil before planting. This is the highest-value application for most vegetable and flower gardens.
- Top dressing: Spread a half-inch layer around established plants. Earthworms and rain will gradually incorporate it into the soil.
- Compost tea: Steep finished compost in water for 24-48 hours, then strain and use as a liquid soil drench around plant roots. This is a lower-concentration option useful for container plants.
Store unused finished compost in a covered bin or pile to preserve its moisture and microbial activity until you're ready to use it. With a well-managed system, you can expect a steady, renewable supply of amendment that keeps improving your soil with every growing season.
Frequently Asked Questions
Timelines vary widely depending on your method and how actively you manage the pile. A hot, regularly turned pile can produce finished compost in 4-8 weeks. A passive, low-maintenance pile may take 6-12 months. Smaller particle sizes, proper moisture, and frequent turning all speed things up.
A healthy compost pile should smell earthy, not foul. Bad odors usually mean too many greens (nitrogen), too much moisture, or insufficient airflow. Turning the pile and adding dry browns like cardboard or straw typically resolves the problem within a few days.
Yes. Compact tumbler bins and indoor worm bins (vermicomposting) work well in small spaces, including apartments and condos. These systems contain odors and process scraps efficiently without needing much square footage.
Plain cooked vegetables and grains are generally fine in a hot, well-managed pile. Cooked foods with oils, sauces, or seasonings are best avoided because they attract pests and break down unevenly. When in doubt, stick to raw plant material.
No. A properly assembled compost pile naturally attracts microorganisms and earthworms from surrounding soil. Commercial activators are not necessary, though adding a shovelful of finished compost or garden soil can introduce beneficial microbes to get things started.
A commonly recommended starting ratio is roughly 3 parts browns to 1 part greens by volume. This isn't a strict formula - if your pile smells or gets slimy, add more browns; if it stops heating or decomposing, add more greens and moisture.
The content provided on our blog site traverses numerous categories, offering readers valuable and practical information. Readers can use the editorial team’s research and data to gain more insights into their topics of interest. However, they are requested not to treat the articles as conclusive. The website team cannot be held responsible for differences in data or inaccuracies found across other platforms. Please also note that the site might also miss out on various schemes and offers available that the readers may find more beneficial than the ones we cover.